Reliable Corpus Christi Roofers use high-quality materials for roof replacements and repairs. They also provide regular inspections and maintenance to prevent problems from arising.
A durable roof acts as your first line of defense against severe weather conditions, safeguarding you and your loved ones. It requires a lot of expertise and reliability to maintain its integrity for years to come.
Expertise
Reliable roofing contractors have a good idea of the kind of roof that is best for your home based on local weather conditions. The fact that they have a lot of experience in the field makes them capable of providing valuable advice in this regard. They can help you choose the right type of roof that will give you the maximum protection that your money can buy.
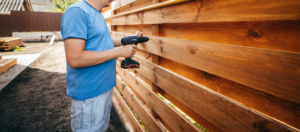
Besides being skilled and trained in working on roofs, they also have the necessary tools needed for the job. As a result, they can finish the job quickly and efficiently. This can help save you a significant amount of time and money, especially during scorching summers when the weather is at its worst.
Reliable roofing experts can easily identify other issues in the structure of your roof and advise you on the best way to go about fixing them. This will help to improve the performance of your roof, enabling it to provide better insulation and protect your home from external elements.
They have a wide range of products and materials to work with, so they can offer the best solutions for any of your roofing needs. They will also be able to guide you on the use of energy-efficient roofing materials, which can lead to significant savings on your energy bills in the long run.
You can also count on them to provide you with the required insurance coverage. This is important because it ensures that you are covered in case any accident occurs while you are on the job. Moreover, it is essential to verify their license before hiring them. This will enable you to know whether they have any unresolved complaints or disciplinary actions against them.
Reliable roofers are not only certified by the government but they also follow the professional codes of conduct. This means that you can trust them to take care of all your roofing requirements without causing any damage to the property. In addition, they will not disappear after the project is completed, which is a common occurrence with fly-by-night roofers.
Compliance With Building Codes
A reliable roofing expert is aware of and complies with local building codes. This ensures that the project is done correctly and minimizes the risk of structural damage or safety risks for homeowners in the future. It also eliminates costly and inconvenient repairs that can result from incorrect or shoddy work. This is especially important for homes located in climates prone to extreme weather conditions.
Reputable roofing contractors prioritize the use of high-quality materials that offer superior durability and weather resistance. This protects the roof and everything beneath it from harsh conditions such as scorching sun, heavy rains, and windy or snowy winds. It also helps prevent leaks that can cause major and costly damage in the long run. Additionally, they can improve the aesthetic of the home by incorporating roofing materials that complement the architecture and design theme.
Another essential characteristic of a reliable roof is proper insulation and ventilation. These features help to keep the house cool and comfortable in summer and warm and dry in winter. They also reduce the burden on heating and cooling systems, resulting in significant energy savings. Furthermore, they can prolong the life of the roof by reducing thermal stress and moisture buildup.
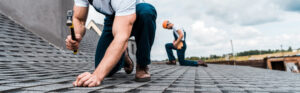
Lastly, a reliable roofing expert can perform regular inspections and routine maintenance to spot issues early on. This includes repairing minor issues like loose shingles, cracks, or punctures. They can also conduct regular gutter cleaning and inspect the flashing and seals. This prevents problems from arising and allows them to be fixed promptly before they become worse.
Reliable roofing experts provide comprehensive services that safeguard residential properties and enhance their value. From initial assessments to long-term maintenance, they play a vital role in preserving the integrity and security of homes. They can also help homeowners navigate the complex cost dynamics involved in repairing or replacing their roofs, helping them to make informed decisions that align with their budget and long-term needs. Moreover, they can assist homeowners in understanding the benefits of investing in a durable roof, which is crucial for ensuring the safety and well-being of their families.
Transparent Communication
The ability to communicate clearly and concisely with customers is a hallmark of reliable roofing contractors. They offer transparent pricing structures and detailed contracts to avoid misunderstandings throughout the project. Moreover, they provide in-depth information on roofing materials and timelines, which allows homeowners to make informed decisions about their investments.
Reliable roofing experts also prioritize safety protocols to protect themselves and their clients. Their team is trained to follow strict safety guidelines, minimizing risks and potential injuries during any roofing project. This approach is reflected in the quality of their work and ensures that all work is completed with meticulous care.
Roofing projects involve several different elements, including electrical, plumbing, and HVAC work. In addition, they may require special permits to ensure compliance with local regulations. Reliable roofing contractors understand the complexity of these issues and can navigate them smoothly, ensuring that the project is carried out according to the law.
Additionally, reliable roofers can offer comprehensive warranties on their work, extending the protection of the homeowner’s investment well beyond the completion of the project. This demonstrates their confidence in the quality of their workmanship and commitment to customer satisfaction.
Homeowners should look for a roofing company with a local presence, as this indicates a commitment to the community and often translates into greater reliability. In addition, a local presence makes it easier for homeowners to reach out to the roofing contractor in case of any post-installation concerns or emergencies.
The quality of a roof depends on the construction materials and installation technique used. The best roofing material for your home should be able to withstand the conditions in your area and protect the structural integrity of the property. Whether you need a new roof or a replacement, a trustworthy roofing contractor will help you select the right material for your needs and budget. They will also explain the advantages and disadvantages of each material, so you can make an informed decision that best meets your needs. They will also recommend any additional upgrades or repairs that can further protect your roof and improve its functionality and lifespan.
Warranty Coverage
A reliable roofing company will offer warranties to their clients, protecting them in case something goes wrong with the roof after they finish the job. This is a great way to show that they stand behind their work and want it to last for a long time. They will also be more willing to make repairs in the future if they notice any issues that may have occurred due to improper workmanship.
A top-rated roofing warranty should offer comprehensive coverage that matches the lifespan of a home’s roof material. However, many homeowners misunderstand the nuances of these warranties by assuming a ‘lifetime’ warranty covers the entire lifespan of the roofing materials when in reality, it only offers a limited duration of protection.
In addition, a warranty should cover the cost of the roofing installation and replacement materials. This will allow you to avoid spending additional money when you are already dealing with a huge expense for repairing or replacing your roof.
Reliable roofing contractors will offer you a combination of manufacturer and contractor warranties to safeguard your investment in a new roof. Manufacturer warranties typically provide a lifetime warranty on the shingles, while contractor warranties focus on the quality of workmanship during the roofing project.
The duration of a roof warranty depends on the geographical location and weather conditions, with harsh climates having reduced warranty periods. In addition, most of these warranties have exclusions and restrictions that you should carefully review to understand what you are protected against and what isn’t covered by the warranty.
When choosing a roofing contractor, make sure you get referrals from friends and family and do your research online to find a trustworthy company. Then, schedule a free estimate with the company you are considering. During this meeting, the contractor should explain their process in detail and provide a detailed written estimate that breaks down all costs, including labor, materials, and other expenses. Also, the contractor should be licensed and insured and have workers’ compensation to protect you in the event of accidents. In addition, they should adhere to strict safety standards during the roofing project and follow local building codes.