Your roof provides an essential barrier between your home and the elements. It protects you from obvious dangers like precipitation and high winds but also from less obvious problems like rot and mold.

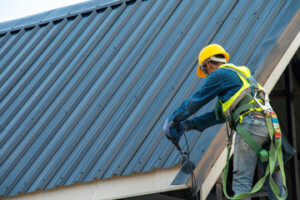
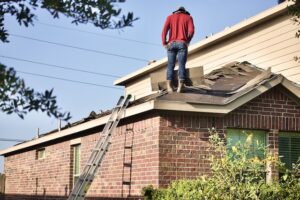
Conduct a walk-around inspection of the entire roof using binoculars or a ladder (never step on the roof!). Check for shingles that are missing or damaged, rust spots on flashing, and downspouts that direct water away from the foundation. For more details, visit https://redstickroofing.com/baton-rouge.
A roof inspection is a vital component of a comprehensive maintenance plan. Without routine checks, minor issues might go unnoticed and then snowball into major concerns that compromise the structure of the home or expose inhabitants to health risks such as mildew or mold.
A thorough roof inspection includes checking for damage and other problems such as punctures, cracks, displaced or missing shingles, clogged drainage systems, and more. Depending on the roof’s type, this might also include a visual examination of the underside or ridgelines to spot any signs of leaks.
The first step in a roof inspection is to examine the gutters and downspouts from the ground to confirm that they are free of debris and functioning properly. From there, the inspector will look for sagging or other structural issues. This will include examining the soffit boards that cover the underside of the roof overhangs as well as the fascia boards that run along the edges of the roof overhangs.
After that, the inspector will examine the condition of the roof’s flashing and sealants, including any penetrations such as chimneys, vent pipes, skylights, or other equipment that create holes in the roof. These penetrations are typically lined with various boots, seals, or flashing to prevent water from seeping into the walls. The inspector will check these flashings for rust or other damage and ensure that the penetrations are properly sealed and sealed correctly.
Other things the inspector will look for during a roof inspection are any shingle damage or wear that might indicate a problem with the roofing materials, such as blisters or granule loss. He will also examine the shingles to see whether there are any areas where shingle tabs might have come loose or fallen off, which would leave them vulnerable to wind and rain. The inspector will also examine the roof’s ventilation and insulation, ensuring that they are in good working order and keeping moisture from condensing inside. He will also look at the gutters and downspouts to see if any are leaking or blocked. He will also look at the chimneys and skylights to make sure that they are in good condition and pointing in the right direction.
Debris Removal
Debris removal is a crucial part of roof maintenance. It includes anything from leaves, twigs and branches that fall on your roof to trash that carries in the wind. It also includes biological growth such as moss and algae, which can harm shingles and other roofing materials. It’s important to remove these as soon as you notice them.
Leaving debris on your roof can hide damage that could be expensive to fix in the future. It can also cause clogging that leads to water accumulation and other problems.
It’s best to remove all debris from the roof on a day that is dry and not windy. If you’re comfortable on a ladder, you can use a broom and gloves to clean away debris. If you don’t feel comfortable, it’s best to let professionals do the work for you.
A clean roof is more energy efficient than one covered in dirt, twigs and debris. It’s also better at reflecting heat, which reduces the workload of your air conditioner and may lower energy bills.
In addition to removing visible debris, you should also clear the gutters and drains of leaves, branches, and other waste. These are critical for ensuring that water is directed off of the roof and not into the home’s walls, foundation or other structures.
Keeping your roof clean will extend the life of your shingles or other roofing materials and prevent moisture-related damage such as sagging, leaks, and mold. It will also help your roof to reflect more heat, which can lower your cooling costs. It’s important to remove biological growth such as moss and algae, too, as they retain moisture and can accelerate the deterioration of roofing materials. Finally, it’s a good idea to remove debris such as tree limbs or branches that have fallen during storms. These can break off and fall during future storms or even injure someone below. This is especially true of trees or bushes that hang over the roof. Fortunately, a regular cleaning schedule can help to prevent these issues.
Flashing Inspections
When it comes to protecting the structural integrity of a building, roof flashing plays an important role. It is designed to seal areas where water could leak, potentially causing extensive damage and even jeopardizing the safety of those inside the building. Regularly inspecting and maintaining roof flashing reduces the risk of leaks and other water-related issues.
A professional inspection of the roof flashing can identify signs of deterioration, such as raised nail or screw heads and discolored or rusted metal. These are indications that flashing needs to be replaced or repaired. In addition, an inspector can examine the condition of flashing around chimneys, vent pipes and other protrusions on a roof to ensure they are adequately sealed and prevent water from leaking into the home.
Inspecting the shingle flashing can also help identify any missing or damaged shingles, which should be addressed immediately. This is one of the most common causes of leaks, as a small hole in the shingle can allow moisture to penetrate underneath and cause further problems. Additionally, an inspection can determine if the shingles are sagging or if there are any signs of mold growth or weakened materials.
The gutters and drainage system of a roof are another area that should be examined during a roof maintenance inspection. The gutters are intended to channel rainwater away from the house, which can otherwise cause foundation and basement problems. Inspecting the gutters can ensure they are properly angled, free of debris and securely attached to the roof.
The flashing on a roof is sheet metal that is fabricated into a specific shape to prevent water from penetrating the roofing material. It is commonly used in areas of a roof that are prone to leaks, such as valleys. Typically, the flashing in a roof valley is made up of long pieces of metal that are positioned along the center of the valley and then covered by overlapping shingles to create a tight seal. Most flashing is made from a durable metal, such as copper, zinc or aluminum. However, it is also possible to find plastic or rubber flashing, which tend not to last as long as metal.
Roof Repairs
Roof repairs are a part of every home maintenance service and they should be performed as needed to extend the lifespan of your roofing materials. They are also crucial to protect the structure and inhabitants of your home. Roof repair services address issues that may include shingle damage, leaks, standing water and moss and algae growth. They can be either cosmetic or structural, with the former focused on improving the appearance of your roof while the latter addresses functional issues like reducing energy costs.
Leaks are probably the most common roof repair issue homeowners face and can result from many different problems, including deteriorating or loosening shingles, flashing and other roof components. If left unattended, leaks can cause major and expensive damage to your property. Leaks can be detected by noticing moisture spots on your ceilings, drywall or in the attic and by checking for water stains on your roof.
Standing water can be caused by a variety of factors, including low points in your roof decking, sagging areas or even clogged gutters. When water pools on your roof, it can cause rot and mold and lead to structural damage. Keeping your roof clean and regularly inspecting it can prevent these issues.
A poorly maintained roof can lose value when it’s time to sell your house, as potential buyers will see it as a sign that it’ll require extensive and costly repairs in the near future. On the other hand, a well-maintained roof can boost your home’s value by demonstrating its longevity and durability.
Your roof acts as a protective barrier between you and the elements, and it is essential to keep it in good condition to ensure that you are safe from the sun, rain, snow, ice and wind. Regular inspections and repair can help to avoid larger problems that require extensive and expensive repairs, as well as to reduce energy waste and improve your home’s indoor comfort.
A well-maintained roof can increase your home’s value and add to its curb appeal. It can also make it easier to sell your home, as potential buyers will have confidence that the roof is in good condition and can be trusted to serve their family for years to come.